Coding Yet
About
Privacy
Contact
What are Higher-Order Functions in JavaScript
What Is Hoisting In JavaScript And How It Works
How to Make Shallow & Deep Clone of a JavaScript Object
How To Convert Decimal To Binary
Behaviour Of The “this” Keyword In Various Contexts
How To Remove All Elements Of A Certain Class In JavaScript
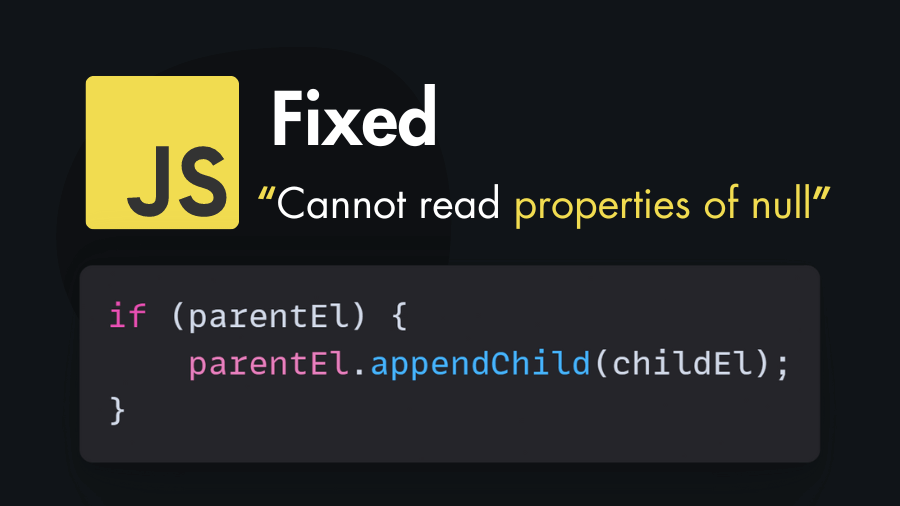
How to Fix Cannot read properties of null (reading ‘appendChild’)
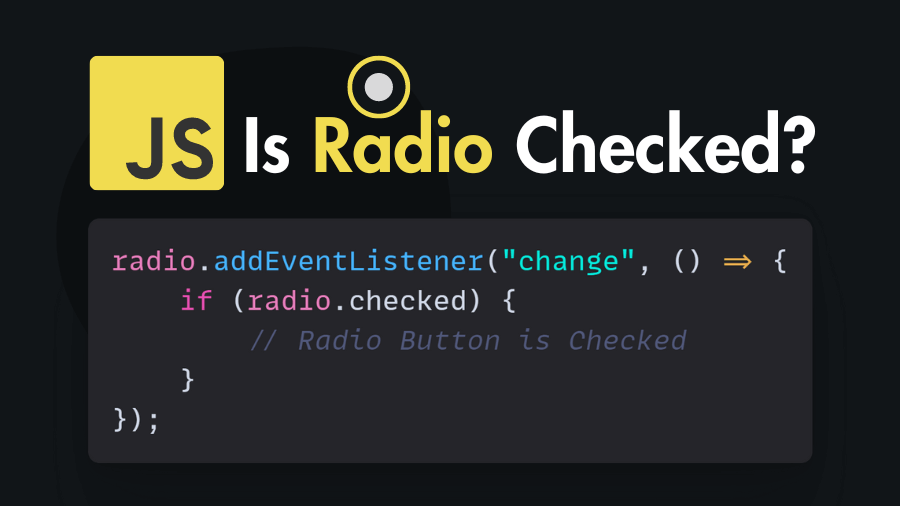
JavaScript Event to Check radio button is checked
How To Make Node.js MySQL Login & Signup System
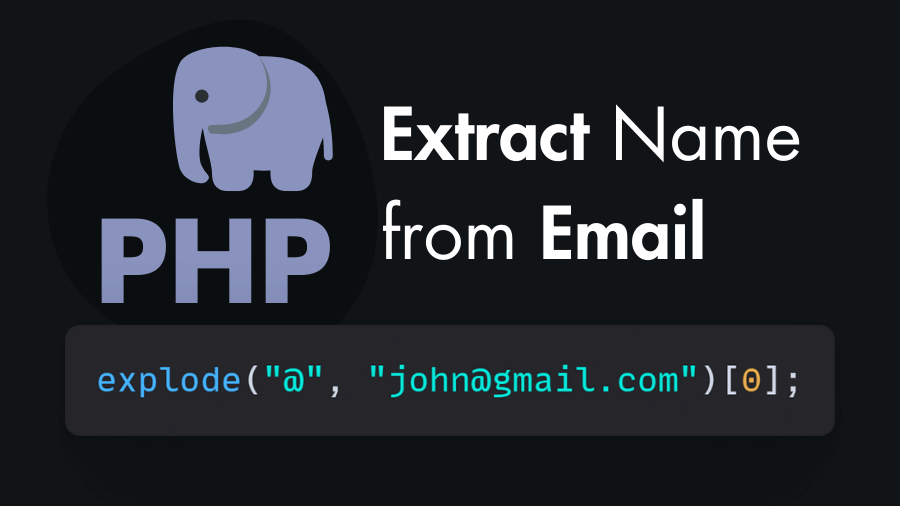
How To Extract User Name From Email Using PHP
1
2
…
9
Next
We use cookies to ensure that we give you the best experience on our website.
Privacy Policy
Got It!